
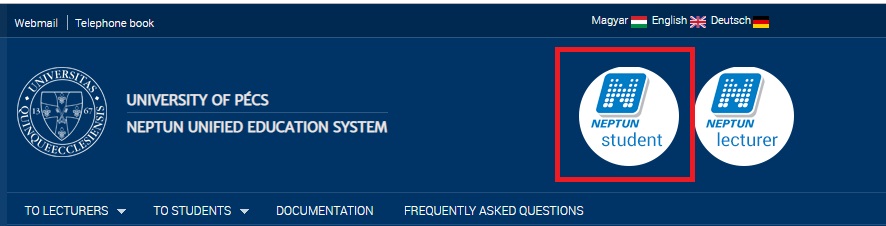
To access the Neptun educational system, visit the website of the University of Pécs (or a particular Faculty) and click on the label / icon in the top menu. We recommend the neptun.pte.hu site initially. Recommended browsers for the system: Microsoft Internet Explorer, Mozilla Firefox, Google Chrome.
On the Neptun web interface, first you will find a login screen where you can login with your username and password (you can also chose the language). Neptun's interface is available in three languages: Hungarian, English, German. Your username is either a six-digit Neptun code (N3PT0N) composed of capital letters and numbers, or if you were previously a student or employee of the University, a seven-digit EHA code composed of capital letters and numbers ending with PTE (ABCDEF0.PTE) .
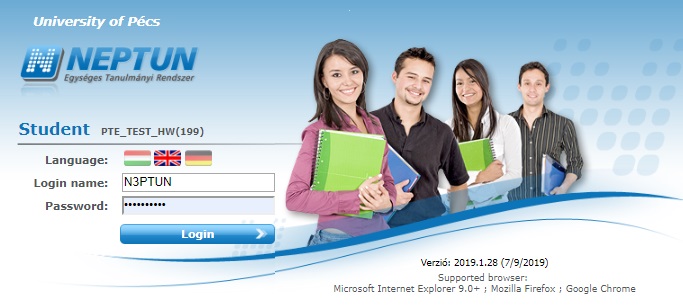
The University uses a central identification system, meaning that the same user name and password are required for each university application. In order to protect users, the number of incorrect logins has been limited, meaning that 20 failed login attempts within a 20-minute period will result in a 6-hour entry ban (taking into account all University applications). Thus, the program returns two kinds of error messages when your login is unsuccessful: "Invalid username or password." - if the username or password has been entered incorrectly. You should pay attention to the difference between Zero and O. "The user has been temporarily disabled." a message is received if the user has exceeded the 20 failed attempts and has been disabled.
More information on password management
After successful login, the main page of the educational system will appear. In the upper left corner, you can see your current training program. The name (code) of the training, the semester of your enrolment, your training schedule and the starting date of your student status are displayed. By clicking on the Training link, you can use the drop-down list to change your training program (as far as you are/were enrolled to more training programs). In the upper right corner, you can see your name and Neptun username. Also, a timer that counts down based on the idle time and exits the user after 10 minutes. You can log out with the Logout button.
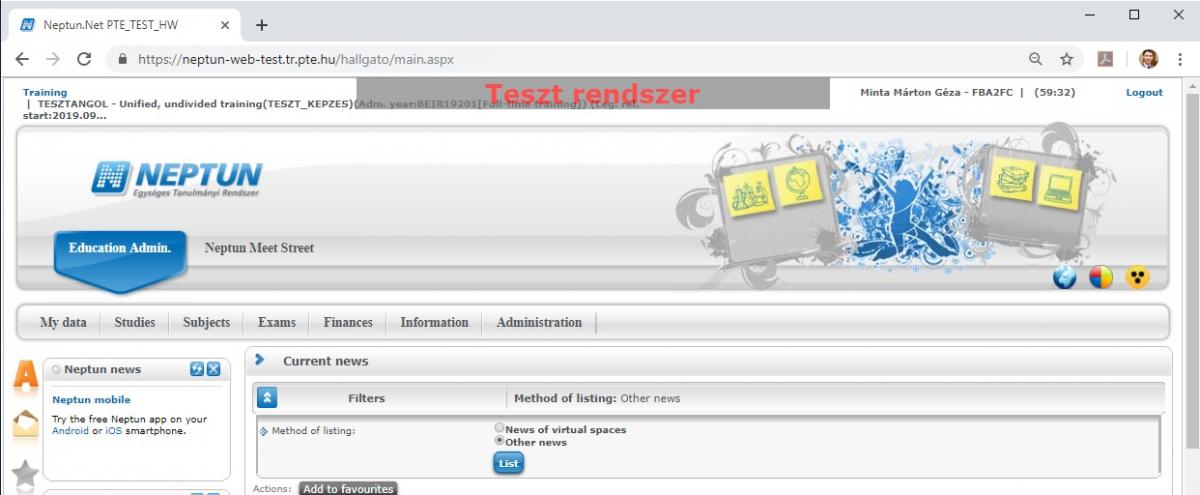
Under the Neptun logo, you will find the educational system and the Neptun Meet Street (NMS) icons. While the educational system serves as an administrative interface (registration, application, payment), the NMS is used for communication within your courses, sharing notes, materials, and sub-semester tasks.
On the right side, you can see three icons ![]() . You can change the language, the skin, or activate the high contrast mode.
. You can change the language, the skin, or activate the high contrast mode.
The main menu bar breaks down into larger categories. Under My Data, you can enter and manage your personal data and contact information, and your password.
More information on modifying your personal data
More information on managing your contact details
Under the Studies menu, the program provides information on study progress, curriculum status, gradebook and also the thesis management.
Under the Subjects menu, you can register to courses and check your courses you have already registered. Under this menu item you can also manage your mid-term tasks (the same function is available from NMS).
More information on subject and course registration
Under exams menu, you can register to your exams. You can also find your e-exams here, which are exams to be filled online.
More information on exam registration
More information on e-exams
Under Finances, you can find your fees, payments, and grants. You can also add a new bank account, or pay the retaken exam fees and request invoices about your payments.
More information on the payment of fees
The Information menu item contains several different topics and its main purpose is to provide information. You can search on subjects, students, classrooms, study materials, or reports on the student evaluation of lecturers. Neptun e-learning menu is very useful in learning more about the Neptun web interface.
In the case of the Administration menu, the name speaks for itself. Under this menu, you can (you can find more information on the link):
enrol/Register for the semester;
apply for dormitory placement;
submit requests;
fill in student evaluation of lecturers;
request a student card;
request student loan;
apply to final exams;
select specialization.
On the left side of the interface, you can see news, messages, favourite functions, and calendar in the boxes. In this block, the messages menu is very important. Both automatic and user messages can be sent via the system. Message forwarding to your e-mail address may also be set for automatic messages. These include e.g. changes in course schedules, new exam times. User messages (e.g. the lecturer messages the students) are always sent to the e-mail address as well.
More information on automatic message settings
The central block of the interface always show the content of the actual menu. Table have filters to help in finding the necessary information.
More information on the use of the web interface